Providing Best Services in Huntsville & Madison, AL
.webp)
.webp)
Follow us on Social.


.webp)
.webp)
.webp)

May 18, 2026
.webp)
3 Min
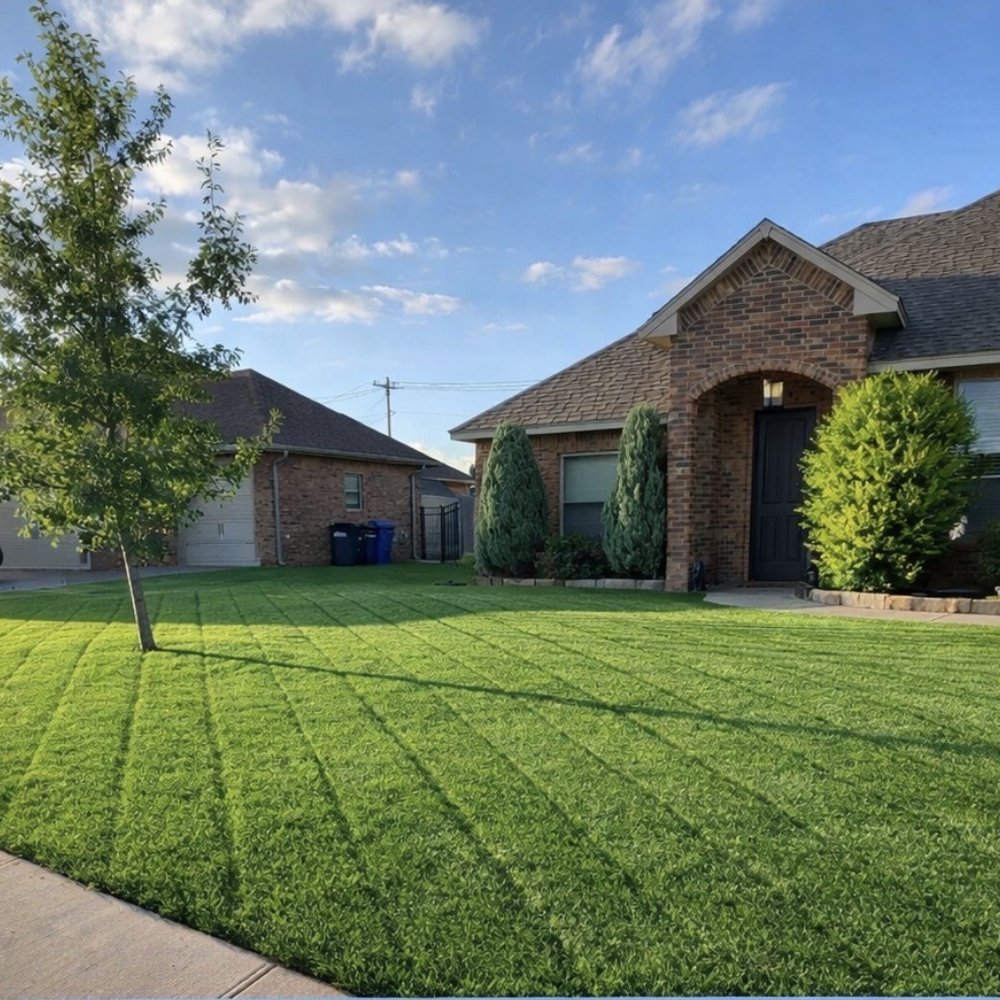
Sod Installation for Immediate Lawn Coverage
Sod installation gives you a fully green, usable lawn in 2 to 3 weeks instead of the months it takes to grow grass from seed, with immediate erosion control and weed suppression from day one.
Sod installation for immediate lawn coverage is the fastest way to turn bare dirt, patchy grass, or a worn-out yard into a lush, green lawn. Unlike seeding, which takes 2 to 4 months to fill in and up to a full year to fully mature, sod gives you a finished-looking lawn the moment it is laid down. Within 2 to 3 weeks, the roots establish in the soil and the lawn is ready for normal foot traffic.
In this guide, we cover how sod installation works step by step, the best time of year to lay sod, how to prepare your soil, how to care for new sod in the critical first weeks, and how sod compares to seed for different situations. According to data from Lawn Love, professional sod installation costs $1.70 to $2.60 per square foot, while seeding costs just $0.07 to $0.23 per square foot. The higher price of sod buys you instant results, immediate erosion control, and a lawn that is usable in weeks instead of months.
How Sod Installation Provides Immediate Lawn Coverage
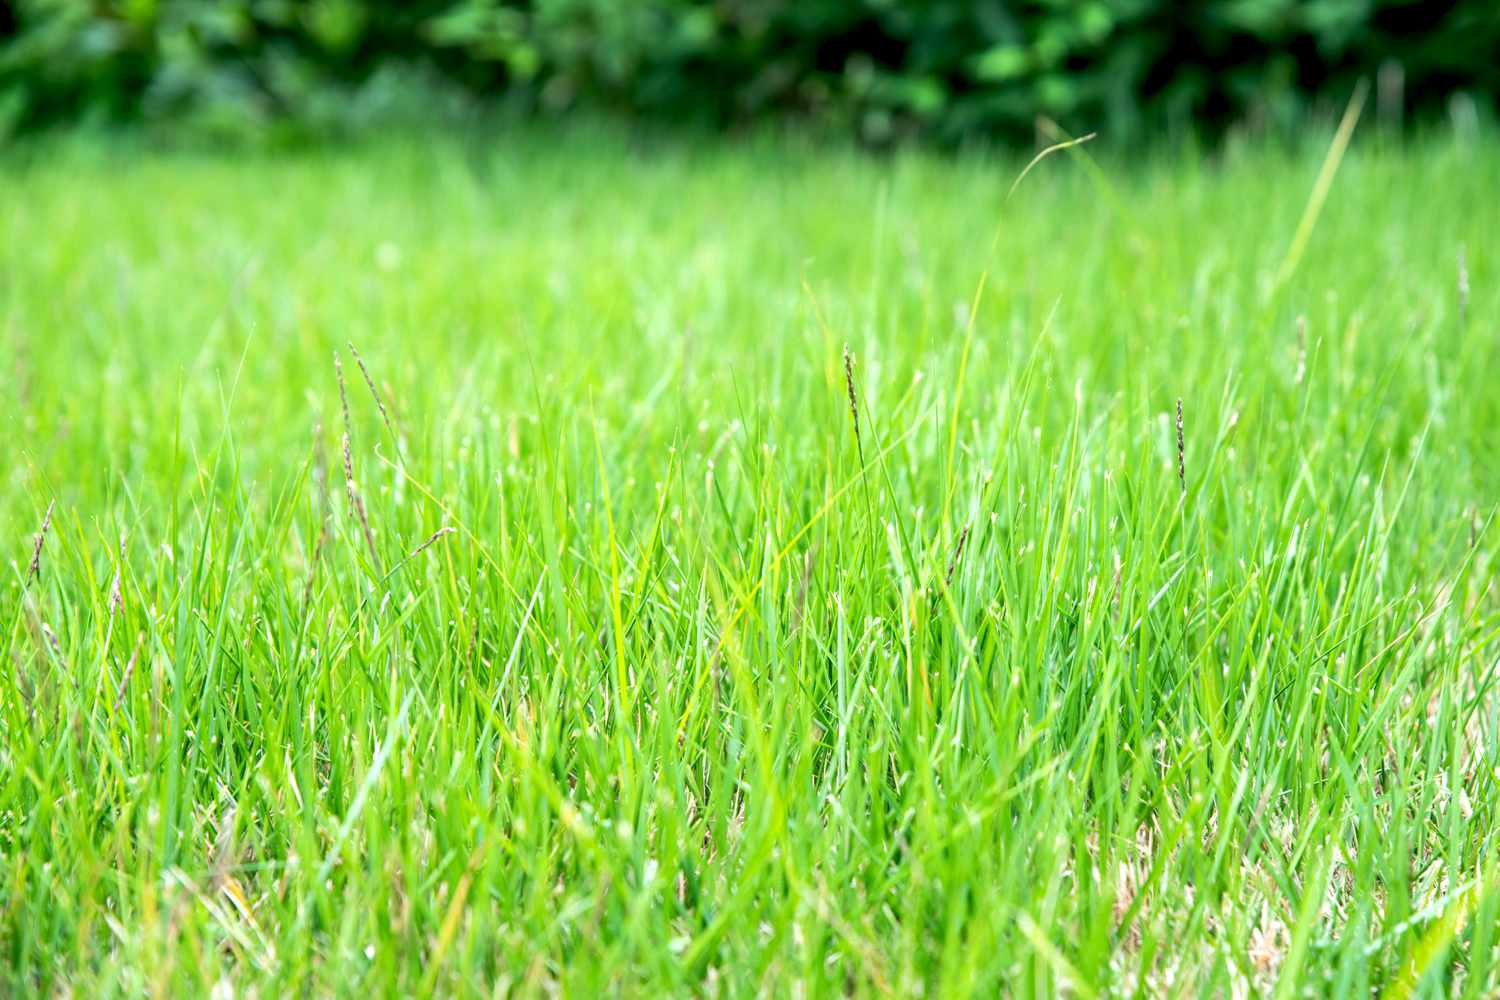
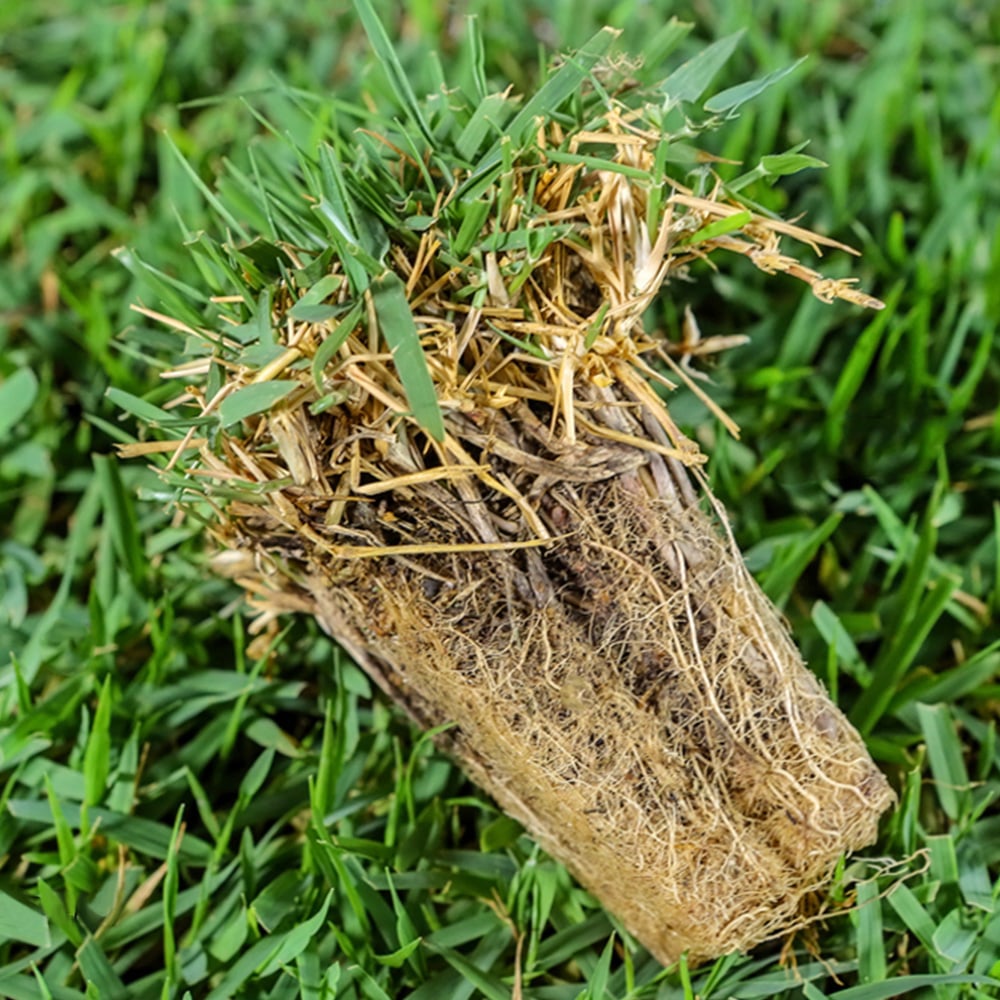
Sod installation provides immediate lawn coverage because the grass is already fully grown when it arrives at your property. Sod farms cultivate turf for 18 to 24 months before harvesting it in strips or rolls with the root system intact. When those rolls are laid on prepared soil, the existing root mat makes contact with the ground and begins growing into your yard within days.
This is a completely different process from seeding, where you start with bare soil and wait for tiny seeds to germinate, sprout, and slowly fill in over weeks and months. With sod, coverage is 100% from the moment it is installed. There are no bare patches, no gaps, and no waiting period where your yard looks like a dirt lot.
Sod also acts as a natural weed barrier from day one. The dense mat of established grass leaves no room for weed seeds to take hold. According to ScienTurfic Sod, a leading sod producer, properly installed sod develops a deep root system that outcompetes weed seeds for nutrients, making it far more resistant to weed invasion than a newly seeded lawn. We see this advantage play out constantly in our landscape installation projects across the area.
What Is the Best Month to Put Sod Down?
The best month to put sod down depends on whether you are planting warm-season or cool-season grass. For warm-season grasses like Bermuda, Zoysia, and Centipede, which are the most common types in the Southeast, late spring through early summer is ideal. Choosing the best grass type for your Alabama lawn depends on your yard's sun exposure, soil type, and how you plan to use the space. April through June gives these grasses the entire warm growing season to establish deep roots before winter dormancy.
For cool-season grasses like fescue and Kentucky bluegrass, early fall is the best planting window. September and October bring cooler air temperatures while the soil is still warm, which encourages strong root growth without the stress of summer heat.
The good news is that sod can be installed any time the ground is not frozen and water is available for irrigation. This flexibility is one of the biggest advantages sod has over seed, which must be planted during narrow seasonal windows to germinate properly. In North Alabama, where we work in USDA Zone 8a, the planting window for sod stretches from early March through late November in most years. Our landscape installation team can help you pick the right grass type and timing for your specific property.
How to Prepare Soil Before Laying Sod
You prepare soil before laying sod by removing old grass and debris, tilling the ground 4 to 6 inches deep, testing and amending the soil, grading the surface for proper drainage, and applying a starter fertilizer. Soil preparation is the single most important factor in whether your sod thrives or fails. Skipping this step is one of the most common sod installation mistakes homeowners make.
Here is the step-by-step process we follow on every sod project:
- Clear the area of all existing grass, weeds, rocks, and debris down to bare soil.
- Till the soil 4 to 6 inches deep to break up compaction and allow new roots to penetrate easily.
- Test the soil pH. Turfgrass thrives in a pH between 6.0 and 7.5 according to Mississippi State University Extension. Adjust with lime if too acidic or sulfur if too alkaline.
- Add 2 to 3 inches of quality compost and work it into the loosened soil to improve structure, drainage, and nutrient content.
- Grade the surface so it slopes away from your home's foundation at a minimum of 1% to 2%. Fill low spots and smooth high spots.
- Apply a starter fertilizer high in phosphorus to promote root development.
- Roll the area with a lawn roller to firm the surface and eliminate air pockets, while still leaving the soil loose enough for roots to grow.
Proper soil preparation takes time, but it is the foundation that determines whether your sod investment pays off for years or fails in weeks.
Can You Just Lay Sod Over Dirt?
You can lay sod over dirt, but only if the dirt has been properly prepared. Placing sod directly on compacted, untilled, or unamended soil is a recipe for failure. The roots cannot penetrate hard ground, water pools on the surface instead of soaking in, and the sod dries out and dies from the bottom up.
The dirt underneath the sod needs to be loose, level, and moist. If you are working with bare dirt from new construction, it is usually compacted by heavy equipment and stripped of topsoil. That dirt needs to be tilled, amended with compost, and graded before sod can go down. If you are replacing an existing lawn, the old grass needs to be removed first so the new sod makes direct contact with the soil, not a layer of dead thatch.
One important detail: the final grade of the soil should sit about 1 inch below any adjacent sidewalks, driveways, or patios. Sod adds about 3/4 to 1 inch of height. Setting the soil level slightly low keeps the finished lawn flush with your hardscape surfaces, which prevents tripping hazards and makes mowing along edges much easier.
What Is the Best Dirt to Put Down Before Sod?
The best dirt to put down before sod is a blend of quality topsoil and compost that provides loose structure, good drainage, and plenty of nutrients for root establishment. You want a soil that holds moisture without staying waterlogged and allows roots to grow down quickly into the ground below.
A 50/50 mix of screened topsoil and composted organic matter works well for most sod installations. The topsoil provides mineral content and structure. The compost adds organic material that feeds beneficial microorganisms, improves drainage in clay soils, and increases water retention in sandy soils. According to the University of Maryland Extension, healthy soil should contain about 1% to 5% organic matter. Most subsoils exposed during construction have almost none, so adding compost is essential.
Avoid using pure sand under sod. Sand drains too fast and holds no nutrients. Also avoid using heavy clay from the subsoil as your planting layer. The goal is a balanced, loamy mix that gives roots the best possible environment to establish. A soil test from your local extension office can tell you exactly what your soil needs.
How Soon Can You Walk on Sod After Installation?
You can walk on sod lightly for essential maintenance like watering within the first day or two, but you should avoid regular foot traffic for 2 to 3 weeks until the roots have established in the soil. Walking on new sod too soon can shift the pieces, create gaps, and compress the soil beneath the sod, all of which interfere with root development.
You can test whether the roots have taken hold by gently tugging on a corner of the sod after about two weeks. If you feel resistance, the roots are anchoring into the soil and the sod is establishing. If it lifts easily, the roots have not yet grown down, and you need to wait longer before allowing normal use.
Pets should also be kept off new sod during this establishment period. Dog urine can burn new grass that is already under stress from transplanting, and foot traffic from pets running across the lawn can tear loose sod pieces apart before they have a chance to root.
What to Do Immediately After Laying Sod
What to do immediately after laying sod is water it thoroughly. Soak the sod and the soil beneath it to a depth of 3 to 6 inches within 30 minutes of installation. Sod is a perishable product, and if the roots dry out even briefly, the grass can go into shock and die.
During the first week, water every morning and again in the late afternoon if temperatures are above 80°F. The soil beneath the sod should feel moist but not soggy. After the first week, begin tapering off to once per day. By week three, as roots establish, you can transition to deeper, less frequent watering that encourages roots to grow down into the soil instead of staying shallow near the surface.
Avoid mowing for at least 2 to 3 weeks. Wait until the grass reaches about 3 to 4 inches tall and the roots have taken hold. During this period, hand-pull any weeds that appear rather than using herbicides. Professional weed control methods can be introduced once the sod is fully established, usually after about three months. When you do mow for the first time, set the blade high and never remove more than one-third of the grass blade at a time. Cutting too short shocks the new lawn and slows root development. A sharp mower blade makes clean cuts that heal quickly, while a dull blade tears the grass and invites disease.
Can New Grass Go Two Days Without Water?
New grass from sod should not go two days without water during the first two weeks after installation. The root system has been cut from its original soil and is completely dependent on surface moisture to survive until it grows new roots into your yard. Even 24 hours without water in hot weather can cause the edges of the sod to shrink, curl, and turn brown.
After the first two to three weeks, once roots have anchored into the soil, the sod becomes more drought-tolerant and can handle a day between waterings. By week four or five, you should be transitioning to a normal watering schedule of 2 to 3 times per week with deeper soakings that encourage root depth.
If you notice the sod turning a bluish-gray color, footprints staying visible in the grass for more than a few seconds, or edges curling and pulling away from neighboring pieces, those are signs the sod needs water immediately. Early morning watering is best because it gives the grass all day to absorb moisture before the heat of the afternoon.
Does New Sod Go Into Shock?
Yes, new sod can go into shock if it is not watered properly, if it sits too long before installation, or if the soil beneath it was not prepared correctly. Sod shock shows up as yellowing, browning, wilting, or a general failure to green up in the days after installation.
The most common cause of sod shock is dehydration. Sod should be installed the same day it is delivered, ideally within hours of being cut at the farm. Every hour that sod sits on a pallet, heat builds up inside the rolls, and the roots begin to dry out and die. If installation cannot happen the same day, keep the sod in shade, unroll the pieces if possible, and mist them lightly with water.
Poor soil contact is the second most common cause. If there are air pockets between the sod and the soil, the roots have nothing to grow into. Using a lawn roller after installation presses the sod firmly against the soil and eliminates those gaps. We see these issues frequently in our work and always recommend professional installation to avoid them. A properly installed lawn from a professional installation crew avoids the mistakes that lead to sod shock.
Is Sod Dead If It Turns Yellow?
Sod is not necessarily dead if it turns yellow. Yellowing can be a sign of transplant shock, overwatering, underwatering, or nutrient deficiency, all of which are fixable if caught early. Completely dead sod turns brown, becomes crispy, and does not respond to watering.
If the sod turns yellow within the first week, the most likely cause is either too much or too little water. Check the soil beneath the sod. If it is soggy and waterlogged, reduce watering frequency. If it is dry and the sod pulls up easily, increase watering. Yellow sod that still has some green at the base of the blades has a good chance of recovering with the right adjustments.
Nutrient deficiency, especially a lack of nitrogen, can also cause yellowing. Wait until the sod has rooted (about 3 to 4 weeks) before applying fertilizer. A balanced starter fertilizer high in phosphorus supports root growth, while the nitrogen component greens up the blades. Applying fertilizer too early on unrooted sod can burn the stressed grass and make the problem worse.
Sod vs. Seed: A Side-by-Side Comparison
FactorSodSeedTime to Usable Lawn2 to 3 weeks2 to 4 months (up to 1 year to fully mature)Coverage at Installation100% instant coveragePatchy; fills in graduallyErosion ControlImmediate; holds soil from day oneNone until grass establishesWeed ResistanceHigh; dense mat blocks weedsLow during establishment; vulnerable to invasionInstallation SeasonAnytime ground is not frozenSpring or fall only for best resultsLong-Term Root DepthGood with proper careDeeper natural root system over time
Sources: Lawn Love, ScienTurfic Sod, Nature's Seed, Mississippi State University Extension, Saratoga Sod
Sod is the clear winner for homeowners who need results fast, have slopes or erosion-prone areas, or simply want a green lawn without the months-long wait. Seed makes sense for large acreage where the cost of sod would be prohibitive, or for homeowners who want a specific grass variety that is not available in sod form.
Can New Sod Get Root Rot?
Yes, new sod can get root rot if it is overwatered and the soil stays saturated for extended periods. Root rot is caused by fungal organisms that thrive in waterlogged, oxygen-deprived soil. The roots turn brown and mushy, the grass wilts even though the ground is wet, and the sod eventually dies.
The key to avoiding root rot is proper drainage and careful watering management. New sod needs frequent watering, but the soil should never be standing in water. If you see puddles forming on the surface or the sod feels spongy underfoot, reduce watering and check whether the underlying soil drains properly. Standing water under new sod is a sign that the soil preparation was not thorough enough or that a drainage issue exists below the surface.
If root rot develops in a small area, let the soil dry out between waterings and apply a fungicide labeled for turfgrass. If the problem is widespread, the underlying soil likely has a drainage issue that needs to be addressed before the lawn can recover. In severe cases, the affected sod may need to be removed, the soil corrected, and new sod installed.
How Does Sod Installation Improve Your Property?
Sod installation improves your property by instantly boosting curb appeal, preventing erosion, suppressing weeds, and creating usable outdoor space. According to research published in The Journal of Real Estate Finance and Economics by the University of Texas at Arlington, homes with strong curb appeal sell for an average of 7% more than comparable homes. A green, well-maintained lawn is one of the most visible elements of that curb appeal. A thoughtful landscape design that pairs fresh sod with well-placed plantings, edging, and hardscape features makes an even bigger impact.
The National Association of Realtors reports that regular landscape maintenance, including lawn care, returns an average of 104% on investment. A healthy, green lawn achieved through sod installation signals to buyers and neighbors that the property is well cared for. It also eliminates muddy yards, reduces dust, and provides a safe surface for children and pets to play on.
On slopes and areas prone to water runoff, sod provides immediate erosion control that seed simply cannot match. The established root mat holds the soil in place from the moment it is laid, preventing topsoil loss during rain. For properties where yard erosion is an ongoing concern, sod is often the fastest and most effective solution.
Frequently Asked Questions
Is October Too Late to Lay Sod?
October is not too late to lay sod in most southern climates. In USDA Zones 7 and 8, soil temperatures in October are still warm enough for roots to establish before winter. Warm-season grasses like Bermuda may go dormant and turn brown through winter, but the roots continue growing slowly as long as the ground does not freeze. The sod will green up again in spring. Cool-season grasses like fescue actually thrive when installed in October because the cooler temperatures reduce heat stress.
How Much Sod Can One Person Lay in One Day?
One person can lay approximately 1,000 to 2,000 square feet of sod in a single day, depending on the terrain, obstacles, and how much cutting and fitting is needed. A standard pallet covers 400 to 500 square feet. For larger projects, having a two- or three-person crew dramatically speeds up the process and reduces the risk of sod drying out before it is installed.
Will Grass Grow Through 2 Inches of Topsoil?
Yes, grass will grow through 2 inches of topsoil, but 4 to 6 inches is the recommended depth for sod installation. Two inches alone does not provide enough depth for a strong root system, especially if the subsoil beneath it is compacted clay. The more quality topsoil you provide, the deeper and stronger the root system will be, and the more resilient your lawn will be during drought and heat stress.
What Are the Drawbacks of Using Sod?
The drawbacks of using sod are higher upfront cost compared to seed, the need for immediate installation after delivery, limited grass variety options compared to seed, and the intensive watering required during the first two to three weeks. Sod is also heavier and more labor-intensive to install, which is why many homeowners hire professional crews for the job.
Is Sod or Fake Grass Cheaper?
Sod is cheaper than artificial turf for initial installation. Sod costs $0.30 to $0.80 per square foot for the material, plus installation. Artificial turf costs $5 to $20 per square foot installed according to industry averages. However, artificial turf requires no watering, mowing, or fertilizing, so it can cost less over a 10- to 15-year period in maintenance savings. The trade-off is that artificial turf does not provide the environmental benefits of real grass, such as oxygen production, carbon absorption, and cooling effect.
What Is Cheaper Than Sod?
Grass seed is cheaper than sod for the initial purchase. Seed costs $0.07 to $0.23 per square foot compared to $0.30 to $0.80 for sod material alone. Hydroseeding, which sprays a slurry of seed, mulch, and fertilizer, is another option that costs less than sod but more than broadcast seeding. The trade-off with all seed-based methods is the longer establishment time, higher failure risk, and lack of immediate erosion control.
How Much Sod Can One Person Lay Per Hour?
One person can lay roughly 100 to 200 square feet of sod per hour on average. This rate varies based on experience, terrain, and how much cutting is required around curves, trees, and garden beds. Professional crews with two or three workers can cover 500 to 1,000 square feet per hour because one person can be cutting and fitting while others lay and roll the sod.
Wrapping It Up
Sod installation is the fastest, most reliable way to get a green, usable lawn without waiting months for seeds to grow. The investment in proper soil preparation, quality sod, and correct watering pays off with a lawn that looks beautiful from day one and stays healthy for years. The keys are preparing the soil right, installing the sod the same day it is delivered, watering thoroughly in the first two to three weeks, and then transitioning to a normal maintenance routine.
At White Shovel Landscapes, we handle sod installation from soil preparation through aftercare across the Huntsville and Madison area. Call us at 256-612-4439 to get a free estimate on your sod project.
.webp)

.webp)


You May Also Like

Jul 24, 2026
3 MIN
How Much Sun Does Zoysia Grass Need

Jul 22, 2026
3 MIN
Can You Mix Zoysia and Bermuda Grass in One Lawn?
Jul 19, 2026
3 MIN
How Long Does Zoysia Grass Seed Take to Grow?
Jul 18, 2026
3 MIN
Is zoysia grass shade tolerant
Stay Connected and Inspired
Get the latest landscaping tips, seasonal care guides, and exclusive offers delivered straight to your inbox. Don’t miss out on expert advice and ideas to transform your outdoor spaces.
Sign Up for Our Newsletter Today!
.webp)


.webp)

Transforming Huntsville & Madison yards since 2010 with expert landscape design, garden makeovers, mulching, and top-quality installations.


